How to cook a Beat on FL Studio - Beginner Level
The chronological steps you have to go through in order to make an instrumental on FL Studio


First Step: melodies
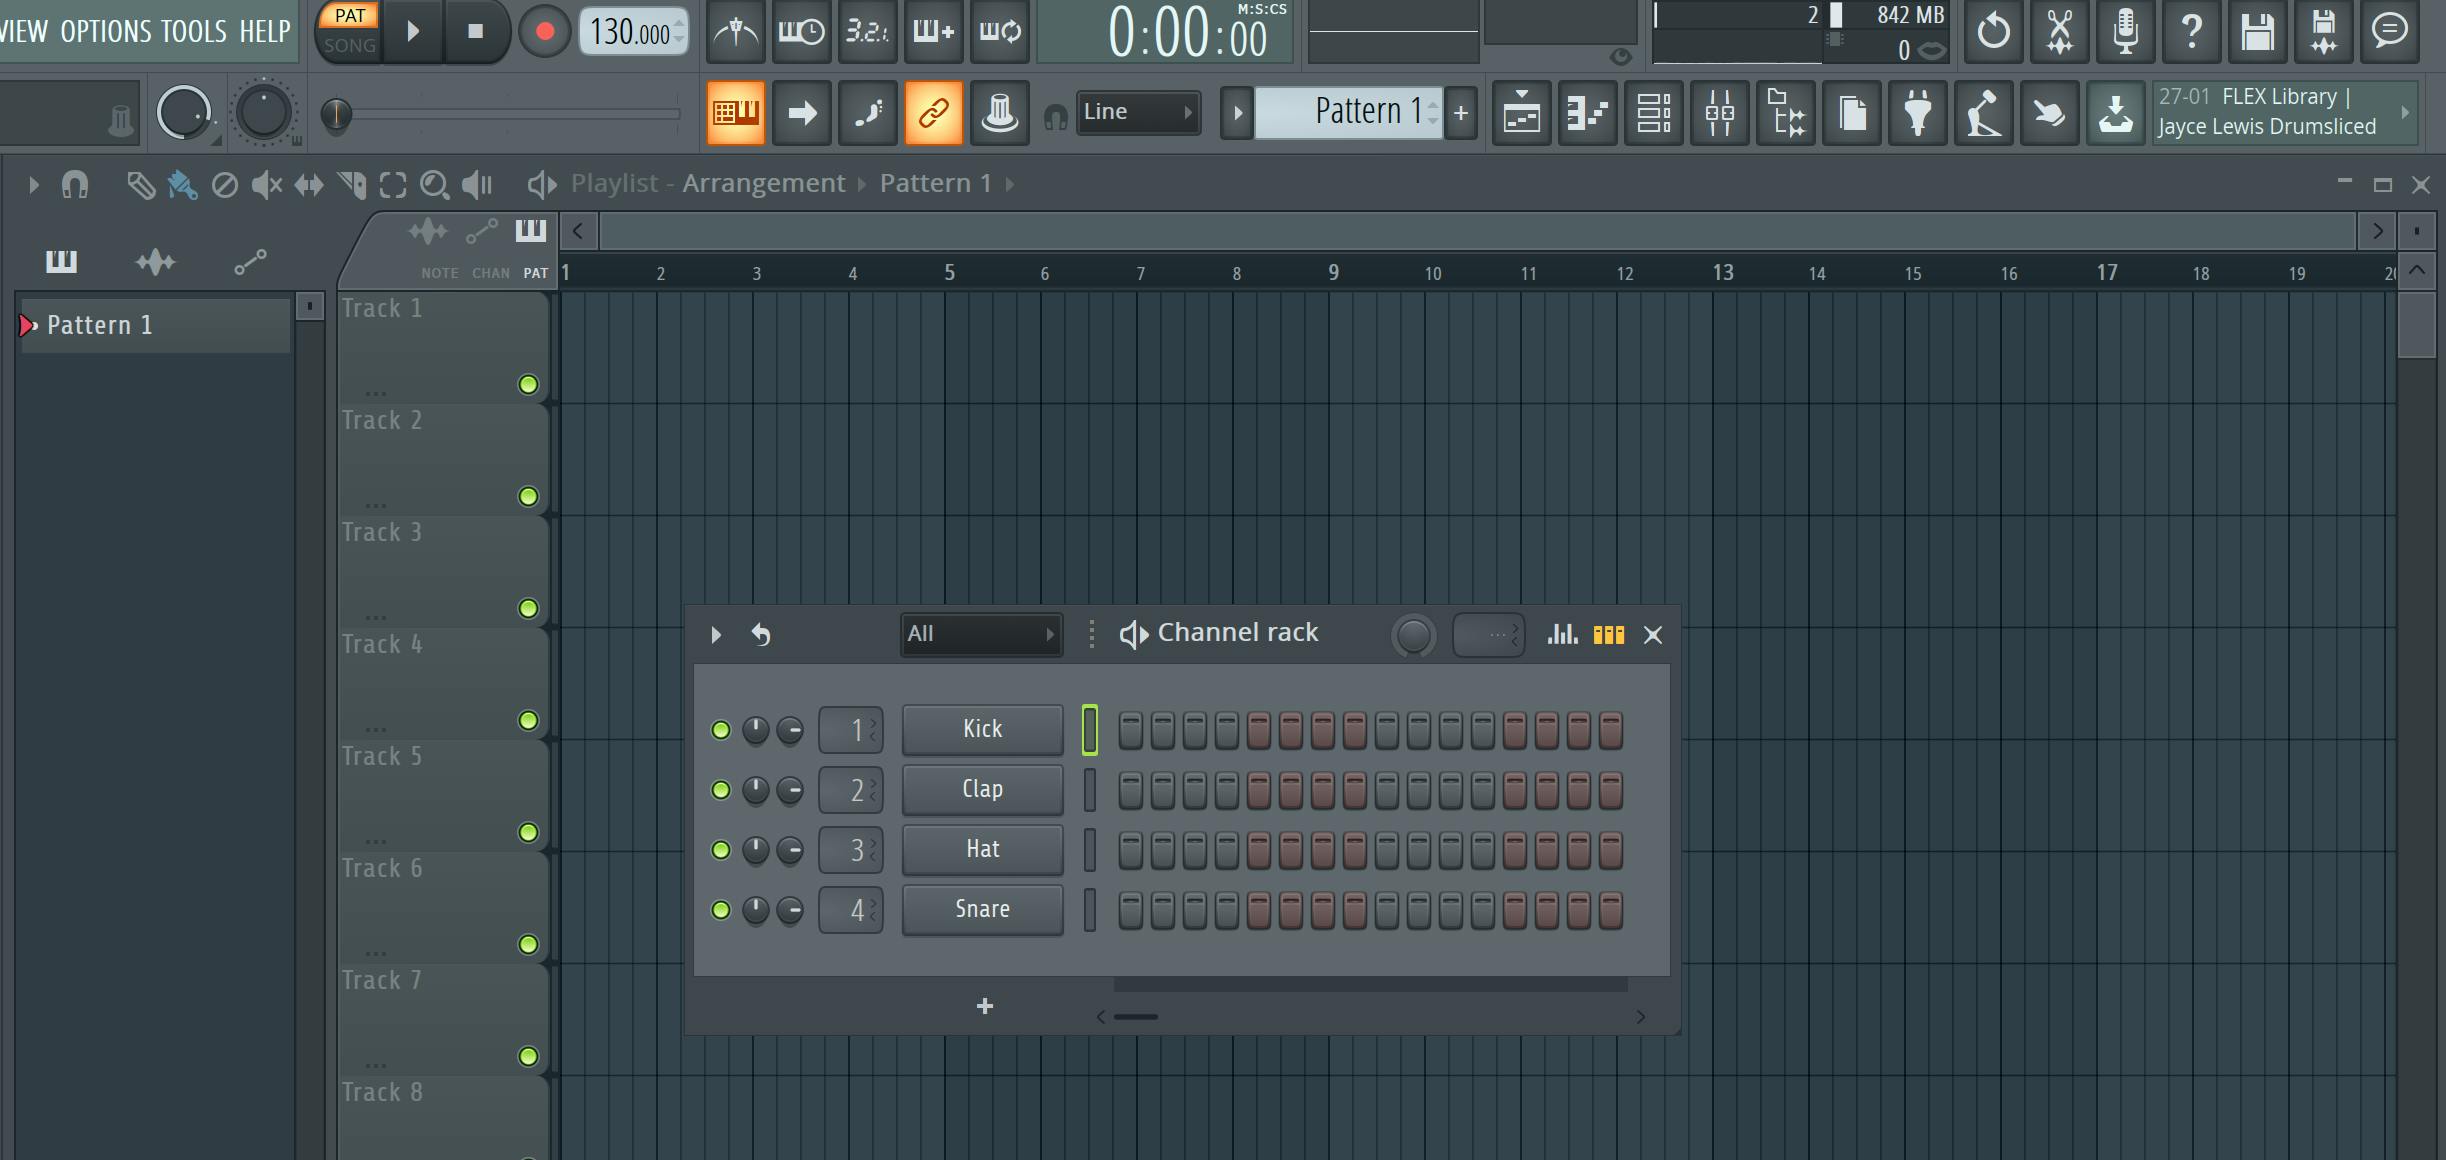 When you land on FL Studio, this is how the software will look like. On the upper right section, you will find: your patterns, the piano roll, the used instruments in the beat and finally the mixer. On the Screenshot, you can see the instruments window as well as the pattern manager in the background.
To start your instrumental, no matter the beat style you are aiming for, you may want to choose a BPM depending on the dynamism you want to give to your music. For example, for a drill beat, the norm is 140 BPM. Then, you will have to cook you melody or melodies. After creating a dedicated pattern, place your notes and harmonics in the piano roll. You can make it sound more human by adjusting their velocity, or even playing with the stereo effect. Repeat the process for your other melodies (you may want to create a counter melody to diversify your verses or enrich them). Finally, add some texture instruments, a bass and various effects (vintage, halftime, love filter, delay) and create an unique atmosphere! You will arrange all your created patterns in a further step.
When you land on FL Studio, this is how the software will look like. On the upper right section, you will find: your patterns, the piano roll, the used instruments in the beat and finally the mixer. On the Screenshot, you can see the instruments window as well as the pattern manager in the background.
To start your instrumental, no matter the beat style you are aiming for, you may want to choose a BPM depending on the dynamism you want to give to your music. For example, for a drill beat, the norm is 140 BPM. Then, you will have to cook you melody or melodies. After creating a dedicated pattern, place your notes and harmonics in the piano roll. You can make it sound more human by adjusting their velocity, or even playing with the stereo effect. Repeat the process for your other melodies (you may want to create a counter melody to diversify your verses or enrich them). Finally, add some texture instruments, a bass and various effects (vintage, halftime, love filter, delay) and create an unique atmosphere! You will arrange all your created patterns in a further step.
Second step: drums
Then, you will have to start building you drum structure. You may want to start with the snare or the hihats to create a regular base rhythm. For a trap Beat, the classic position of the snare is on the third beat of the bar. The classic hihats will hit two times on each beat. To avoid repetition, you can introduce rolls, velocity variations and pitch variations in your hihat pattern. With an amazing hihat pattern in place, you can now add some embellishments with an open hat, reverb on some elements and percussions or even FXs to make your beat bounce. However, make sure not to overload your beat with details, unless it is the effect you want to produce. Finally, add the Kick. If you want to boost it, double click on the element, select the entire Soundwave and choose the option "edit in Edison". You can also add some distortion and saturation to your kick in the mixer with "Fruity Fast Dist". If needed, go on with an 808 pattern and enrich it with some flourishing slides. Congratulations! You are done with the drums!
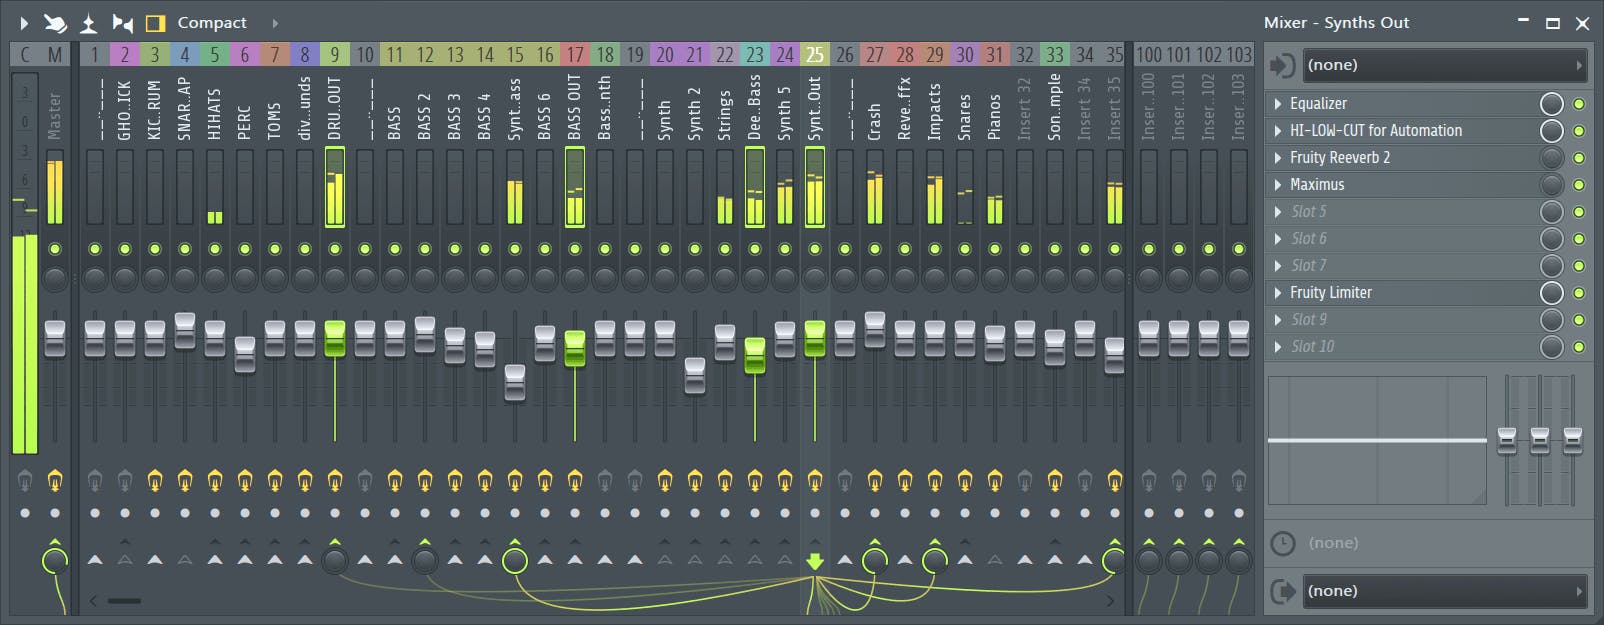
Third step: mixing
Mixing your instruments will allow your beat to sound balanced: this step aims to reduce any kind of saturation that you may encounter if you abused of high frequency instruments or if you were to generous with Kick and 808 distortion. First, go to the mixing tab of FL studio: you will see empty channels. To route an instrument to a channel. Simply select the channel with a right click and route it. The basic mixing consists of adjusting each channels volume with the knob but for an optimised sound quality, you will have to give each instrument its proper space in the instrumental. For example, you may increase high frequencies of a flute melody and reduce its low frequencies to leave some space for the bass and the 808. In addition to the aformentioned point, it is also advisable to cut down the high frequencies of a piano melody for instance. Otherwise, it will interfere with the flute melody. This is made possible by the "Fuity Equalizer", a prebuilt tool in Fl Studio. I will post more articles on mixing advices.
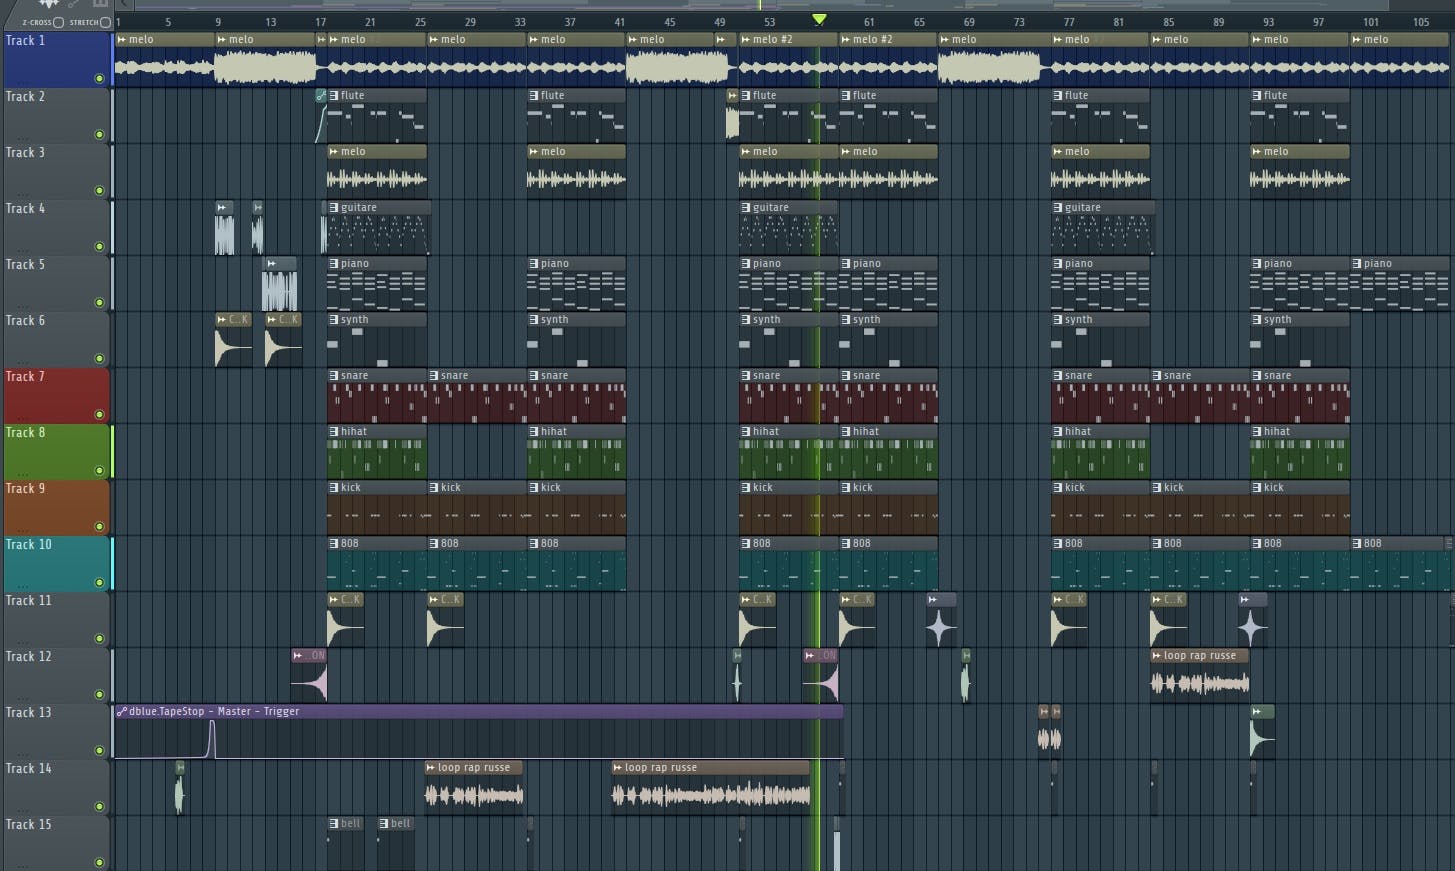
Final Step: structure, Drop and progression
To give you an idea of what a classical beat structure looks like, here is on of my instrumental's arrangement:
 In one word, here is the chronological succession:
- introduction: the introduction is a progression towards the drop. It has to captivate the listener's attention
- the verse: a section of your beat
- the pre-chorus: prepares the chorus
- the chorus: the most impacting part of your track; it has to bring together all the elements of your instrumental
- the bridge: a transitory moment which contrasts with the chorus
- outro: the ending of your instrumental
To manipulate your pattern blocks, use the tools in this section of FL Studio:

PS: Note that these steps are adapted to specific styles of instrumentals which are trap, hip-hop, drill. They they slightly vary if you want to compose in another style, such as EDM, house, etc.